How To Clean and Organize a Kitchen Pantry
Kitchen pantries might seem old-fashioned, but they’re enjoying a renaissance in recent years. A pantry is a great place to keep your dry goods organized, without taking up valuable cupboard space in your kitchen. Follow our Pro tips on how to clean a pantry to keep your pantry neat, preserve your food, and make life in the kitchen so much easier.
Why pantry cleaning matters
You might think you don’t need to clean your pantry, but it’s a good idea to give it a good clear-out once a month or so. This will help you stay on top of the food you’ve got in your pantry and help reduce waste. Regular cleaning is also important to keep pests like weevils and mice away.
How to clean a pantry
It couldn’t be easier to clean your pantry. Just follow these Pro tips!
Step 1: Sort through your pantry and throw away any expired food
Step 2: Donate any food that you know you’re not going to use
Step 3: Empty all the shelves and clean them with an all-purpose cleaner
Step 4: Use liners, parchment paper, contact paper, or old wallpaper to line the shelves
Step 5: Replace the food on the shelves
Step 6: Vacuum or mop the pantry floor
That’s all there is to it. But for the most optimal use of your pantry, it also pays to keep the contents organized as well as clean.
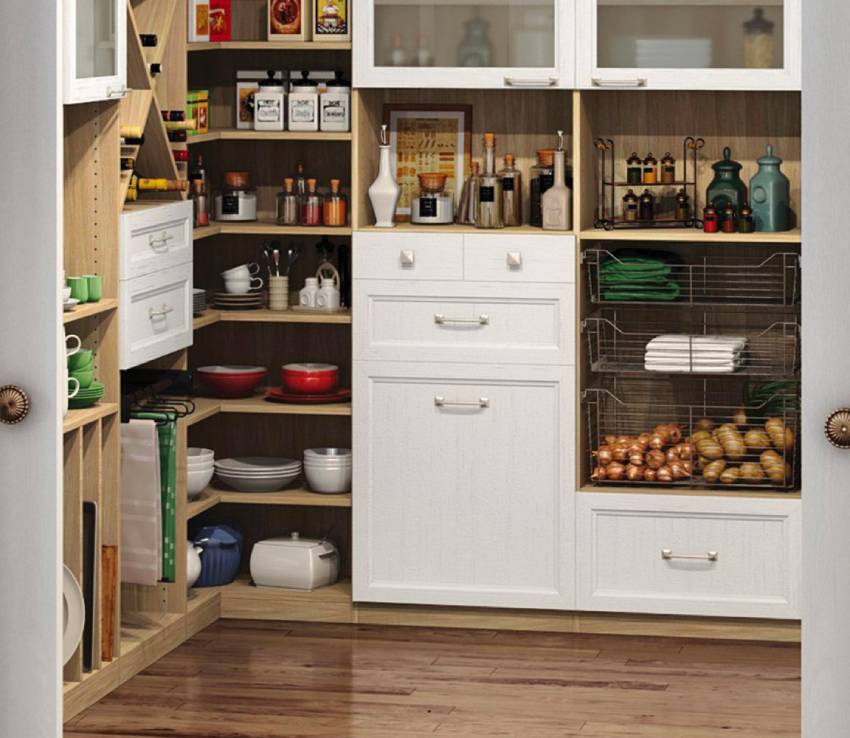
How to organize a kitchen pantry
Organizing a pantry is the best way to help keep your pantry tidy and make the most of your food. There’s nothing more annoying than finding an expensive ingredient gone stale at the back of a shelf, or discovering you’ve bought more of something than you know how to use. With these Pro tips, your pantry will be organized in no time!
- Position food based on how you use it
Keep the items you use the most on the most accessible shelves. That way you won’t be constantly moving things out of the way to get to what you want.
- Keep similar foods together
Put all your breakfast cereals on the same shelf. Do the same with tinned fruit and vegetables, different types of flour, snacks, spices, and any other similar foods. That way even if you don’t know exactly where something is, you know where to look for it.
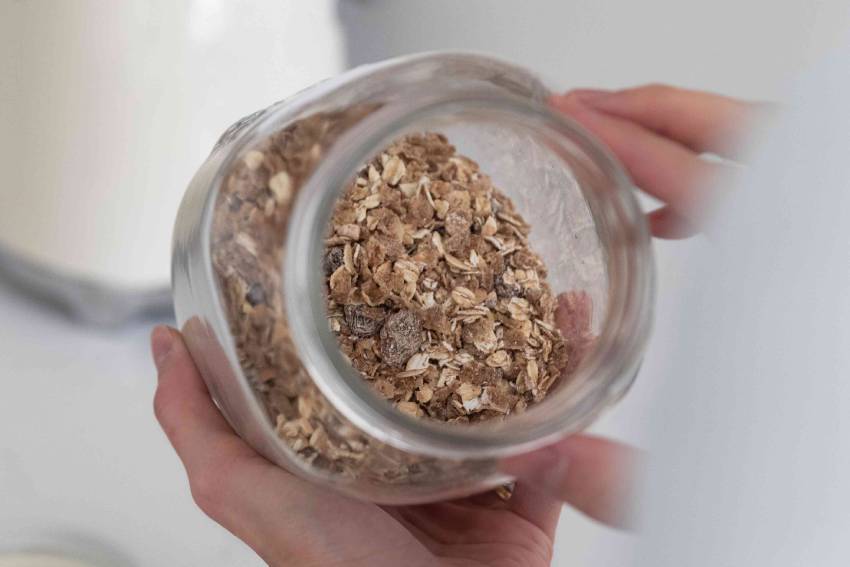
- Use transparent canisters for open foods
Keep anything you’ve opened fresh with air-tight canisters. Using transparent storage containers makes it easier to identify the contents, and lets you see if something’s running out. Keeping your food in canisters can also keep bugs at bay.
- Add door shelves to maximize space
Purchase a cheap wire rack to hang over your pantry door, and use it to store condiments, spices, and other small jars.
- Add a hamper with grabbable snacks
If you’ve got kids, you know the devastation they can wreak on even the neatest pantry! Place a hamper or box with grabbable snacks at eye height to keep things tidy.
- Keep fresher food at the back
When rotating and refilling your pantry, put the food with the longest expiration date at the back of the shelf. That way when you’re in a hurry, you’ll grab the oldest food first.
- Rethink how you label foods
We’ve all seen those Pinterest-perfect or Instagram-incredible pantries with neat labels on every canister. But do you really need to tell yourself where the pasta is when you can see it? Instead, use labels to note the expiration date of your products. And no need to buy a fancy label maker, washi tape looks just as cute, and won’t leave annoying sticker residue behind.
- Consider how you’ll use your food
Those cute mason jars are useless if you want to scoop food with a measuring cup that won’t fit inside the mouth. Before you spend a fortune on your pantry accessories, think about how you’ll use them to access your food. And don’t be afraid to change something if it isn’t working for you.
Pro Tip: Keep organizing! Learn how to declutter your house now.
How to organize a small pantry
If you’ve only got limited space for a pantry, it’s still worthwhile creating one. But you might have to get extra inventive with your storage solutions. Here are some quick tips to help!
- Use all the possible space with storage extenders for under shelves and the back of the door
- Use stackable bins instead of space-hogging canisters
- Put pull-out shelves under your bottom drawer
- Lazy susans make great storage solutions for condiments and jars
- Use stackable can racks to keep canned goods in order
Don’t be afraid to make your small pantry your own. Smart storage solutions designed for closets, offices and utility rooms can make great pantry storage items too! Cheap rolling shelves, folder organizers, and shelf dividers can all help keep your pantry neat and organized.
How to organize a pantry with deep shelves
If your pantry has deep shelves, you might have more storage space than most, but that can lead to products getting pushed to the back and forgotten about. The good news is, there are lots of helpful storage solutions for deep-shelved pantries, that will keep everything accessible when you need it. Here are some tips from our cleaning Pros for managing deep shelves.
- Use tiered stands to keep products visible
- Organize your pantry by product height, tallest at the back
- Can dispensers help bring your canned goods to the front
- Install pull-out shelves so you can easily access goods at the back
- Use baskets or bins to store items on your shelves
- Leave gaps so you can reach items at the back without having to move those at the front
Having too much storage space is a nice problem to have, but it can lead to a messy pantry and forgotten food. By following the above tips, you can keep your deep pantry organized.
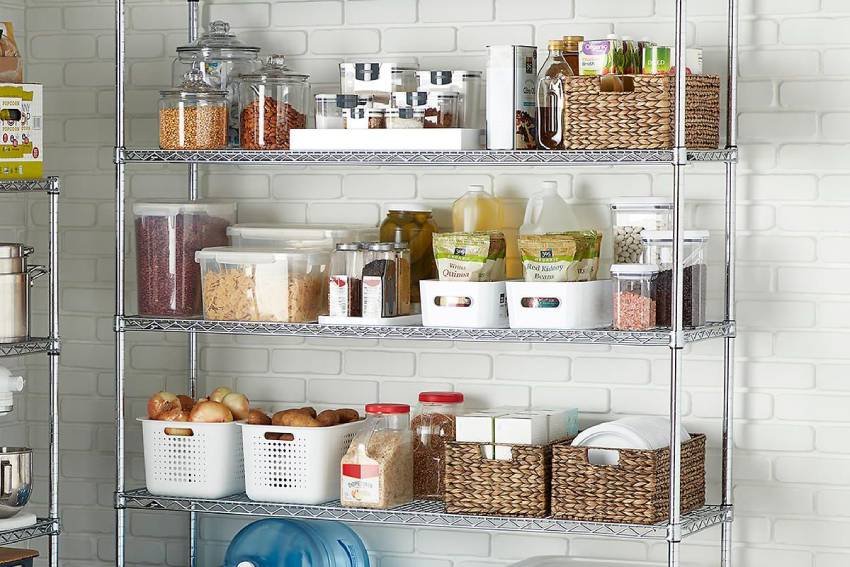
How to organize a pantry with wire shelves
Wire shelves and racks are cheap and easy to install and are great for building a pantry on a budget. However they can also cause problems. The wire can bend, leading to unstable storage and falling food. Here’s how to handle wire shelves to create a tidy, stable pantry.
- Cut plexiglass to size and place it over the wire to create stable shelf surfaces
- Use baskets or bins to store items, instead of placing them directly on the shelves
- Invest in under-shelf racks to create more space between shelves
- Place heavier items near the bottom to keep shelving stable
Wire shelves offer some great pantry solutions, but they do come with some problems. By thinking about how you’re going to use your pantry, you can overcome these issues with clever storage ideas.

How to clean pantry after mice
No matter how clean and organized your pantry is, you could still end up with pests getting inside. Mice are a biohazard and can be incredibly destructive. To get your pantry back in order after mice have discovered it, follow these steps.
Step 1: Get rid of the mice and make sure they can’t come back
Step 2: Wear gloves and a mask to prevent touching or breathing droppings
Step 3: Take everything out of your pantry and discard the food
Step 4: Make a mixture of 1.5 cups of bleach to 1 gallon of water and spray everything down
Step 5: Use paper towels to remove any debris like chewed cardboard and droppings
Step 6: Sponge and mop every surface again in more bleach solution
Step 7: Dry the walls and shelves with paper towels
Step 8: Disinfect or throw away your cleaning supplies (mop head, sponge, cloths, etc.)
Step 9: Wash your hands with warm water and soap for at least 20 seconds
Remember, rodents walk in their pee. That means even if you think the box of spaghetti didn’t get touched, you can’t properly sanitize it. When it comes to sealed cans and jars, use your best judgment. You can disinfect them with the bleach solution, or you can throw them away.
How to clean pantry moths
Pantry moths often hitch a ride into your home in bags of dry goods like flour and rice. Decanting your goods into containers can help you identify and isolate these outbreaks and keep the moths contained. If you spot moths or larvae in your pantry, here’s what to do.
Step 1: Throw away any affected food in the outside trash can
Step 2: Carefully inspect other foods for signs of infestation — if in doubt, throw it out
Step 3: Don’t forget to look at cardboard packages and cans for larvae that have crawled away
Step 4: Disinfect everything with undiluted white vinegar
Step 5: Replace shelf liners and vacuum and clean your whole pantry
Step 6: Hang up muslin bags containing fresh bay leaves, lavender, cedar, or mint to help repel moths in future
Pantry moths are annoying pests, but generally not dangerous. However, if you do spot an infestation, it’s important to tackle it immediately to stop the moths from taking over your dry goods.
How to get rid of bugs in a food pantry
Pantry moths aren’t the only unwelcome visitors that can hitch a ride into your pantry. Gnats, flies, and more can all be a problem. However you can treat them by following the steps above. To prevent more bugs from getting into your pantry, keep your food in airtight containers and make sure to clean up crumbs or spills immediately.
Published at Fri, 15 Apr 2022 13:32:42 -0500
How To Clean Pots and Pans Like a Pro
Your kitchen pots and pans get a lot of hard wear, and that can leave them stained or damaged. To get the most out of your cookware, learning how to clean pans is a must. Luckily, our cleaning Pros know a thing or two about cleaning all kinds of pots and pans so that they gleam like new. Learn our top tips now and keep your kitchen clean and healthy!
How to clean baking pans in 5 minutes
The best time to clean your pots and pans is when they’re still hot from cooking. Simply pour hot water into the pan to deglaze it. This can lift even burned-on food and grease in an instant. Take care, however, to only use hot water with a hot pan. Otherwise, you risk thermal shock, which can cause a pan to warp.
Once the pan has been deglazed, use a sponge or scourer and a drop of dish soap to clean the pan. Then rinse thoroughly with plain water. That’s it! Your pan is fresh and clean again.
Pro Tip: Keep your pans clean by cleaning your glass-top stove!
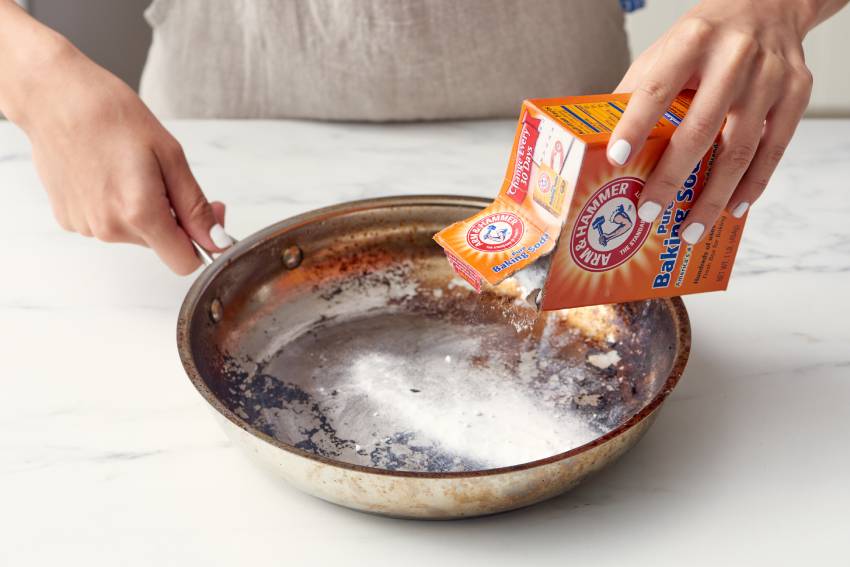
How to clean pans with baking soda
If your pan cooled down with food residue inside it, it can be tougher to clean. First, scrape out any grease or food remains and discard them in the trash. Don’t put grease or oil down your sink, as it can clog your pipes. You can use an old jar or soda can to store used grease and then throw it away.
Use a brush or scouring pad to remove any remaining marks. Hot water and a drop of dish soap will cut through grease and clean the pan in no time. But if you’ve got burned-on food or grease scorch marks on the pan, it’s time to break out the baking soda.
- Clean the pan as much as possible
- Make a paste with baking soda and a little water
- Spread the paste across the bottom of the pan
- Let it sit for 5 minutes
- Take a scouring pad and work in circles across the pan to loosen the stains
Another way to clean a pan with baking soda is to make a mixture of 1 cup of water and 2 tablespoons of baking soda. Pour into the pan until the bottom is covered to about ½ inch deep. If the stain goes up the sides, add more of the solution until the stain is covered.
Then put the pan on the cooker and boil the water until almost all of it has evaporated. Make sure you turn off the heat before all the water evaporates to avoid damaging the bottom of the pan.
You’ll see a white film covering the pan where the water evaporated. This is the remains of the baking soda. Put the pan on a cold burner or trivet and hold it using oven gloves to prevent burning your hands. Then use a long-handled brush to scrub the baking soda off the pan while it’s still hot.
Now you know how to clean aluminum pans, whether they’ve just been used or they’re covered in caked-on grime. However, some types of pans need specialist cleaning to prevent damage. Here’s how to clean all your pans, no matter what they’re made from.
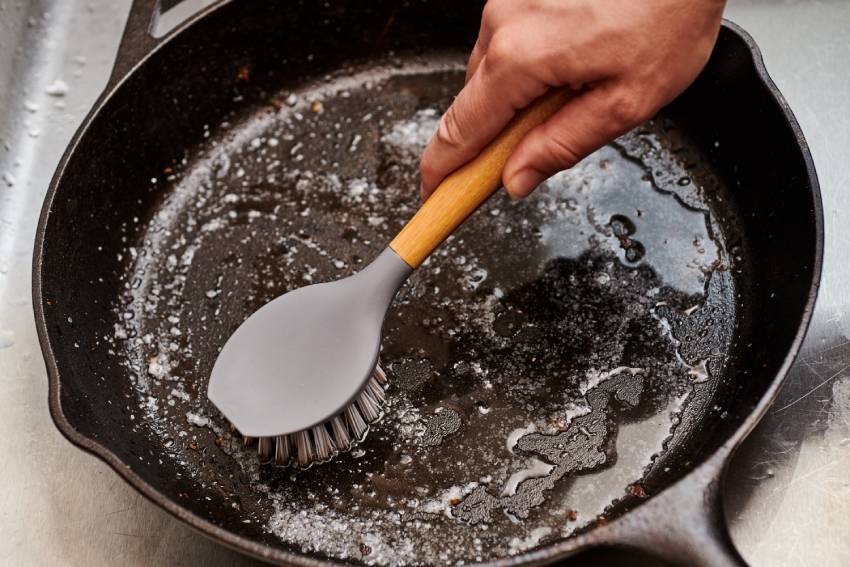
How to clean cast iron pans
Cast iron pans scare away a lot of home cooks because they think they’re difficult to clean. But with the right care, cast iron pans can last longer than almost any other cookware you might use. The most important thing to remember with cast iron is to avoid temperature shock. If the pan is hot, use hot water. And if it’s cold, use cold water!
You should always wash cast iron by hand. It won’t last long inside a dishwasher.
- Pour out an excess oil or grease
- Rinse your cast iron pan in hot water while it’s still warm
- Use a brush or pan scraper to remove any burned-on food
If your cast iron pan cooled and now won’t clean properly, you can remove stubborn marks by heating it again.
- Pour a little water into the pan to cover the base to about ½ inch deep
- Put the pan on the cooker and slowly bring the water to a boil
- Use a pan scraper or brush to work stubborn food free using the hot water
- Wash the pan as usual to thoroughly clean it
After each use, your cast iron pan should also be oiled. Dry the pan thoroughly using a microfiber cloth or paper towel. Then season the pan with a small amount of cooking oil. Use a paper towel to rub the surface and remove any oily residue.
Lodge cast iron pan manufacturers say it is okay to use a small amount of dish soap if necessary to clean cast iron pans. However, you should avoid doing this more than necessary. Dish soap can cut through the protective seasoning of the pan and cause it to rust.
Pro Tip: Dirty oven? Learn how to clean your oven like a Pro!
How to clean cast iron skillet rust
If your cast iron pan does rust, it isn’t the end of the world. You just have to remove the rust and re-season the pan.
Step 1: Scrub the pan with soapy water and steel wool to remove the rust
Step 2: Rinse the pan and dry thoroughly
Step 3: Apply a thin layer of cooking oil all over the pan
Step 4: Use a cloth or paper towel to remove excess oil
Step 5: Place the pan upside down on the top rack of the oven
Step 6: Bake at 450-500 degrees for 1 hour
Step 7: Allow the pan to cool completely
You may need to repeat steps 3-7 several times to build up the black patina that indicates a properly seasoned pan.
Pro Tip: Place a baking sheet on the bottom rack to catch any oil drips.
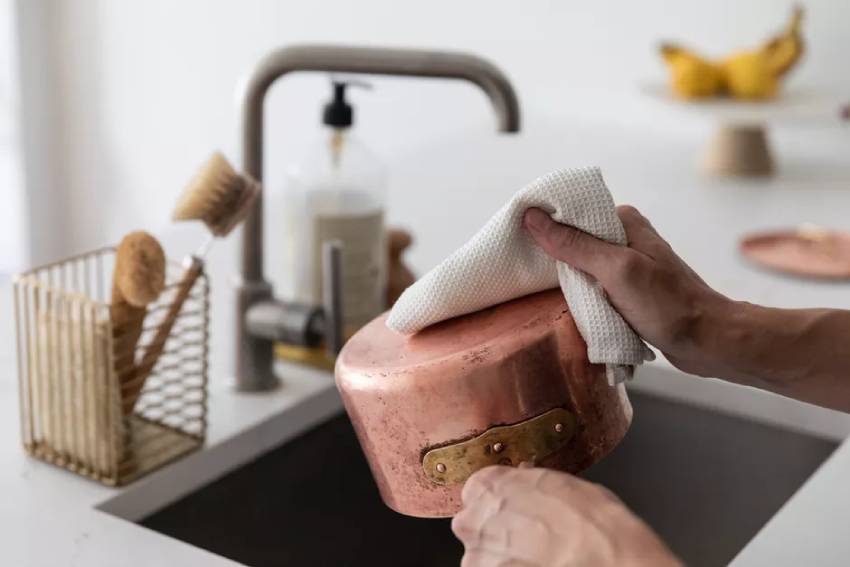
How to clean copper pans
Copper pans are also prized kitchen possessions. Copper is naturally antimicrobial, so it is one of the safest choices for food preparation. In addition, copper is a great thermal conductor, resists corrosion, and is very easy to clean. It’s no wonder copper pans have been prized by chefs for centuries!
When it comes to cleaning copper pans, you do need to take some extra precautions. Copper is a delicate metal, so abrasive cleaners like scourers can scratch the surface of your pans. Copper is also reactive and may discolor after contact with commercial pan cleaning solutions.
Most copper pans are lined with tin, which makes a great non-stick surface. You can clean the inside of your lined copper pans with a sponge, water, and a drop of dish soap. If you do get food stuck inside a copper pan, soak it in hot water for 15 minutes and then try again with the soap and sponge. Once the pan is clean, dry it thoroughly with a microfiber cloth to prevent the copper tarnishing.
How to clean nonstick pans
Nonstick pans are very convenient for cooking, but the nonstick coating can get damaged by abrasive cleaners. Nonstick coatings are also heat-sensitive, so follow these tips to get the most from your nonstick pans. You’ll most often find nonstick coatings on frying pans.
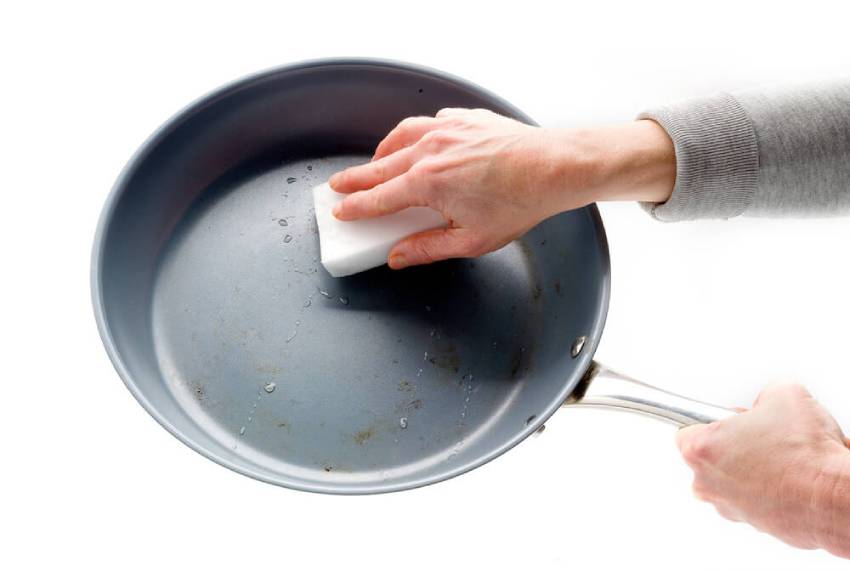
How to clean frying pans
- Let the pan cool completely before cleaning to prevent warping
- Use dish soap to remove grease residue after use, as this can damage the coating
- Avoid using steel wool or abrasive cleaners on nonstick pans
- Use a damp sponge and coarse salt to remove tough stains
- Dry the pan with a microfiber cloth after cleaning
If your nonstick coating starts to peel, it’s time to replace the pan. Most nonstick pans have a lifespan of about five years, which is shorter than other cookware.
|
BAKING SODA
|
|||
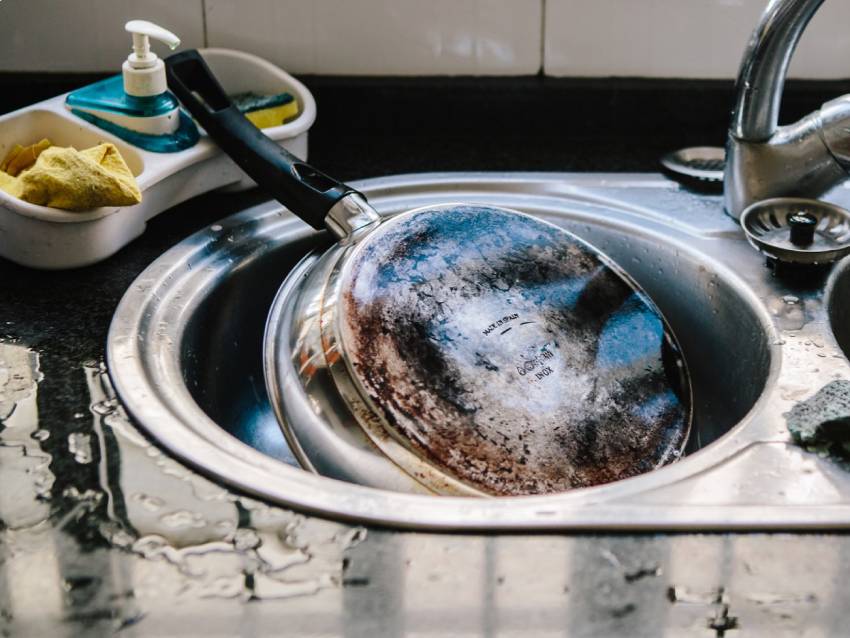
How to clean burnt pans
Sometimes accidents happen and pans end up very burned or discolored. Don’t worry, they can still be salvaged. Just try one of these methods.
Cleaning a burned pan with vinegar and baking soda
- Half-fill the pan with a 50/50 mixture of water and white vinegar
- Bring to the boil and add 2 tablespoons of baking soda
- Remove from the heat and let stand for 15 minutes
- Discard the water/vinegar mixture and scrub the pan with a brush
- Repeat as necessary
Cleaning a burned pan with baking soda
- Fill a large pot or pan with water and add ½ cup of baking soda
- Place the burned pan into the pot, fully submerged if possible
- Bring the water to the boil
- Boil for 15 minutes
- Remove the burned pan and scrub with a brush
Cleaning a burned pan with lemons
- Fill the pan with water
- Add 1-2 lemons, sliced
- Bring the water to a boil
- Remove the pan from heat after 5-10 minutes
- Discard the lemons and hot water
- Clean the pan with soapy water and a scrubbing brush
Published at Tue, 12 Apr 2022 11:10:44 -0500
{articles|100|campaign}How To Clean Your Home After Being Sick
If you’ve just recovered from an illness, the last thing you might want to do is start cleaning. But knowing how to clean a room after being sick is an important step in stopping anybody else from contracting their illness. Diseases like the cold, flu, and COVID-19 can all hang around for days after the original patient has recovered. To protect your family and guests from getting the same illness, it’s important to clean thoroughly.

How to avoid spreading an illness when sharing a home
If you share your home with other people, the best thing you can do if you’re sick is isolate yourself from others. This prevents the disease from spreading. Coughs, sneezes, and stomach upsets can all transmit viruses and bacteria. High-touch areas like door handles, TV remotes, and light switches can also act as fomites and help sickness spread.
To prevent this from happening while you’re sick, follow these Pro tips.
- Isolate as much as possible from other people
- Use disinfectant wipes to clean high-touch points after use
- Keep doors closed to prevent air from circulating inside
- Open windows to allow fresh air into sickrooms
- Use a separate bedroom and bathroom from others if possible
- Wear a mask (for respiratory infections) and wash hands often
- Don’t share personal items like cups, towels, and toothpaste
- Use disposable plates and cutlery
Once you’ve recovered from an illness, you can stop using the above precautions. However, it’s still a good idea to clean thoroughly before everybody in the house can relax.
How to do a Covid deep clean
If somebody in your household contracted COVID-19, you might be wondering how to do a deep clean after a Covid case. The virus that causes Covid is called SARS-CoV-2, and it’s no tougher than any other virus. In fact, the COVID-19 virus has an outer fatty membrane, so anything designed to dissolve fats will kill it. That makes ordinary soap a powerful weapon against the virus!
When cleaning after Covid, you should wear a mask and gloves, and clean all the surfaces that the patient touched. It’s also important to thoroughly clean the rooms the patient was in while they were sick. Just follow our handy guide on how to clean after an illness.
The most common places that need to be cleaned are bathrooms, bedrooms, and vehicles. However, these tips also apply to any other areas of the house that need a good cleaning post-sickness!
Pro Tip: Check out our complete guide to killing the coronavirus on surfaces.
Cleaning a bedroom after sickness
You probably spent most of your time in your bed, so that’s the place to start cleaning. First, open the curtains and windows if possible. Get as much light and fresh air into the room as you can. The UV light in sunlight has germicidal properties so it really can make your room healthier.
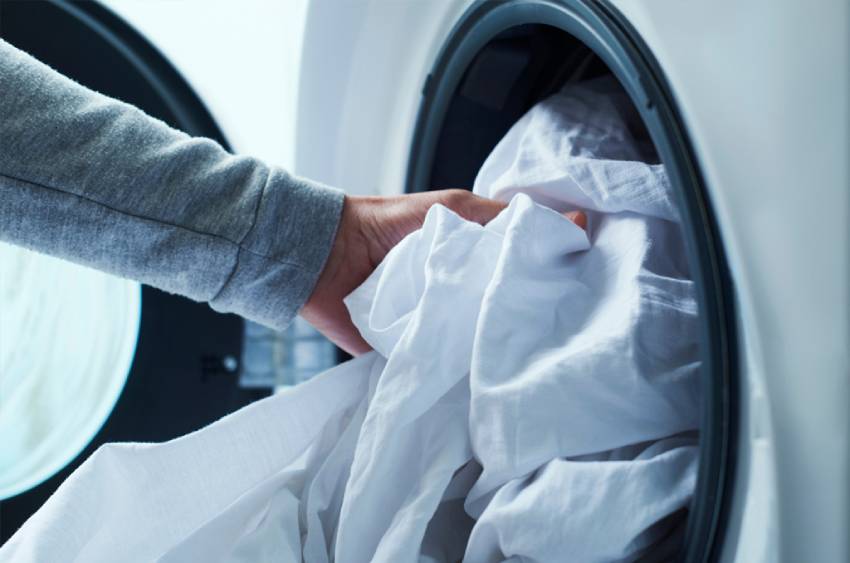
Next, strip the bed. Wash your bedding on a hot water cycle to kill any germs that might be lurking in the fabric. If you use a mattress protector, clean that as well. And also consider cleaning your mattress. A steam cleaner is a great tool that’s suitable for most mattresses (except memory foam).
While washing your bedding, don’t forget any clothes that the sick person wore. They can also go on a hot wash to disinfect them. If you use a canvas laundry bag, wash that too. For plastic or wooden laundry hampers, give them a spray with disinfectant.
Pro Tip: When using a disinfectant, always follow the guidance on the label. Most need to be applied generously and allowed to air dry to be effective against germs and bacteria.
Wipe down any surfaces and objects the sick person touched. That includes bedside tables, alarm clocks, and electronic devices.
Finally, vacuum carpets or mop wooden flooring. Use an appropriate disinfectant spray or soapy water to kill any remaining virus.
Once you’re done cleaning, wash your hands thoroughly with hot, soapy water. According to the CDC, soap is a more effective cleaner than hand sanitizer against COVID-19.
How to disinfect a mattress from Covid
If someone in your house has recently recovered from COVID-19, you need to take extra precautions to prevent others from getting sick. Fortunately, it’s pretty easy to do a deep clean after a Covid case.
- If you weren’t the person who was sick, wear gloves and a mask while cleaning
- Strip the bed and use a vacuum brush attachment to vacuum the mattress
- Steam clean your mattress if possible
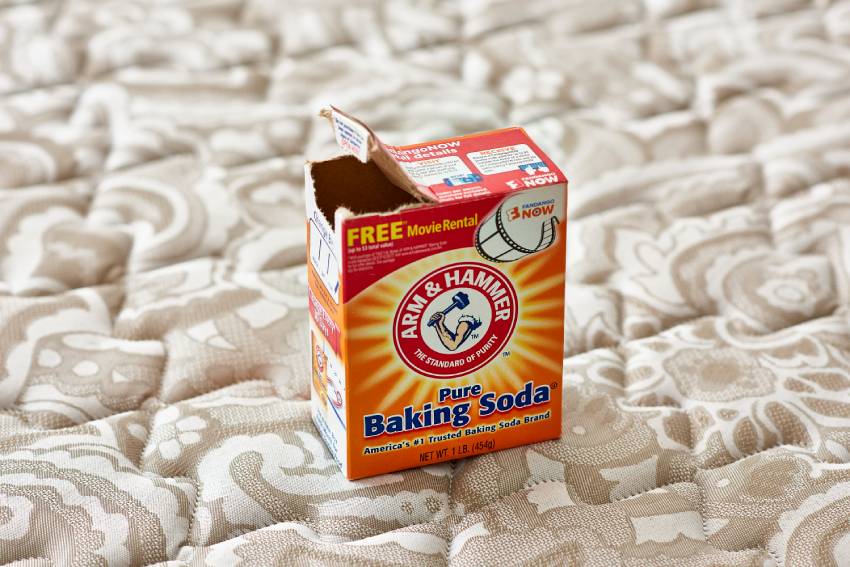
- Alternatively, cover the mattress with a thin layer of baking soda and leave for 4-24 hours before vacuuming up
- Use a fabric disinfectant spray on the mattress and allow it to air dry
- Alternatively, use a little fabric soap and enough water to dampen the mattress and allow it to air dry
How long does Covid last on a mattress?
A study by the U.S. National Institute of Allergy and Infectious Diseases looked at how long SARS-CoV-2 can live on different surfaces. The virus lives the longest on smooth, solid surfaces like plastic and metal. On soft, porous surfaces like cardboard and fabric, the virus only lives a day or two at most.
How long do viruses survive on different surfaces?
|
SARS-CoV-2 (COVID-19)
|
NOROVIRUS (STOMACH FLU)
|
||
|
8-12 hours
|
|||
|
Paper/cardboard
|
Up to 1 day
|
||
|
Stainless steel
|
|||
Cleaning a bathroom after sickness
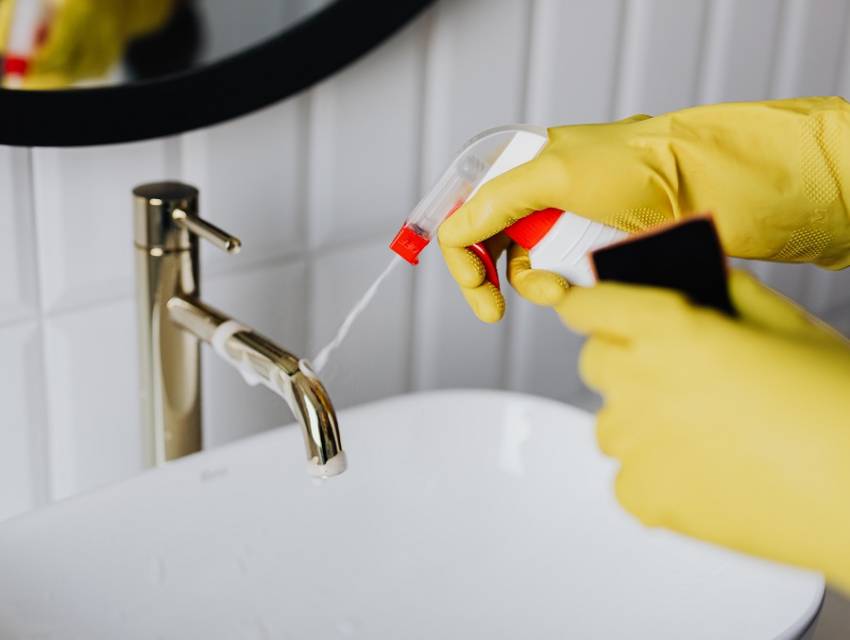
Bathrooms have more non-porous surfaces than bedrooms, so there are more places for the virus to survive. However, bathrooms are usually easy to clean because you can clean most areas with water.
Use hot, soapy water or an appropriate disinfectant spray tested on viruses and bacteria, and thoroughly clean the following areas:
- Bath and/or shower
- Sink and faucets
- Toilet, including handle
- Countertops
- Walls and floor
- Door and door handle
You also need to clean all the bathroom objects the sick person might have touched. Wash the towels and bath mat, and wipe down any bottles, toothpaste tubes, brushes, and anything else with a disinfectant wipe or soapy water.
Pro Tip: Check out our Pros’ review of Clorox vs. Lysol for Covid-19.
How to disinfect a toothbrush after illness
If you use an electric toothbrush with a replaceable head, change it out after you recover from your illness. And don’t hang on to cheap manual toothbrushes either. It’s safer to get rid of them, and they need changing every 3-4 months anyway.
If you do need to disinfect your toothbrush to make it safe for reuse, follow these tips:
- Soak the toothbrush for 5 minutes in antibacterial or alcohol-based mouthwash, then rinse with plain water
- Soak the toothbrush in 3% hydrogen peroxide for 10 minutes, then rinse with plain water
- Use denture cleaner, such as Polident, to sanitize your toothbrush
You should clean all the toothbrushes in the bathroom that the sick person used, not just their toothbrush.
How to clean Invisalign after being sick
If you use a removable dental or oral device such as aligners, retainers, or a mouth guard, you also need to clean them after you’ve been sick. Most of these devices can be safely washed with soap and water. Alternatively, soak them for 5-10 minutes in antibacterial mouthwash or 3% hydrogen peroxide solution.
If you aren’t sure what cleaning solution is right for your device, contact your dentist or physician’s office for advice.

Cleaning a vehicle after sickness
You might not think about cleaning your vehicle, but if you were in it at any time while you were sick, it also needs to be cleaned and disinfected. Viruses can survive very well on the plastic, glass, and metal surfaces inside vehicles, which is why it’s important to clean your car after Covid-19.
You can use soapy water or a disinfectant wipe to clean inside your car. Focus on high-touch areas such as:
- Steering wheel
- Turn and wiper levers
- Door handles and side pockets
- Radio and climate controls
- Rearview mirror
- Gear shift
- Seatbelt strap and buckle
- Grab handles
You also need to clean the seat and armrests used by the sick person. To do this, first vacuum up any loose dirt. Then use upholstery shampoo or soapy water to wash down the seat. Use liquid sparingly. You only want to get the seat damp, not wet. Let the seats air dry, ideally by parking the vehicle in direct sunlight. Try to air the vehicle by leaving the windows open if it’s safe to do so.
Final thoughts
After recovering from an illness, the last thing you might feel like doing is cleaning. But it’s an important step to ensure you remove any viruses or bacteria that might still be hanging around. This can help protect your family and guests from also getting sick. It will also make your home feel like a fresher, brighter place to be, and that can help you feel better too!
Published at Sat, 09 Apr 2022 22:22:04 -0500